
Working with BatrachoWiki
In the section of the website called BatrakoWiki, it’s easy to create content using a fairly simple editor. This section is designed for collaborative work with students on the website. To gain editing privileges for this section, you need to register on the website and request editing rights. During registration, the site will ask you to choose a username and password, and then to solve a CAPTCHA (when I registered a test account, I didn’t get it right the first time, but on the third try, everything worked out). Then, the registered user must obtain editor rights for BatrakhWiki. To do this, you need to send an email to my address—d.a.shabanov(at)gmail.com—and provide me with your username and your real first and last name (so I know which students to award points to for their work). I will grant you editing access to BatrakhoWiki. After that, when you log in, you will see the option to edit pages created in BatrakhoWiki. The "Edit" button is circled in red in the following image.
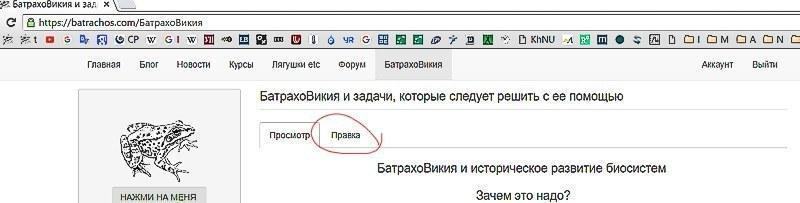
You should start creating your own page by editing an existing one. Open it using the "Edit" button.
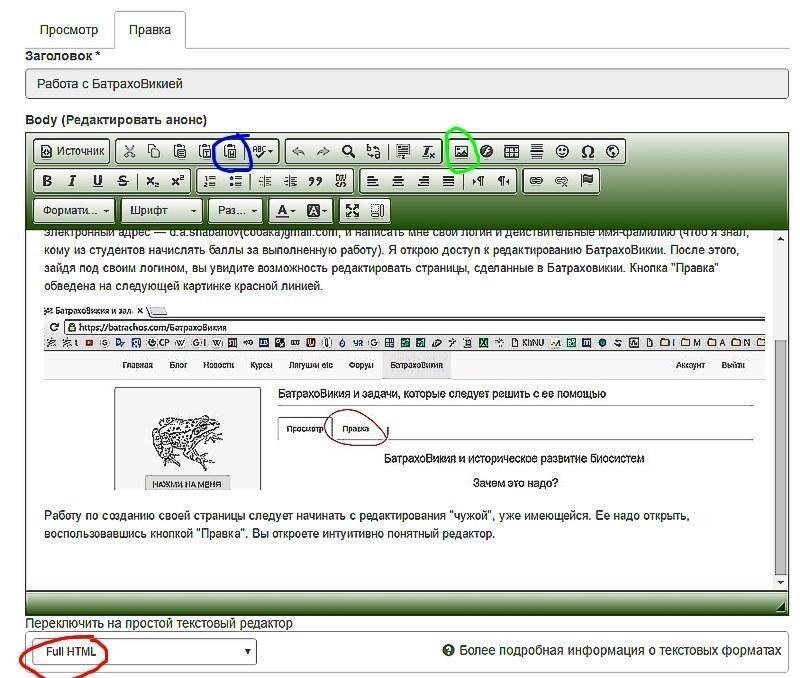
You’ll open an intuitive editor. This is roughly what the page I’m currently editing will look like on your screen. Pay attention to three buttons that are particularly important for you. At the bottom is the mode switch (circled in red). Set it to Full HTML. Sometimes, when you enter a page, you’ll see that Full HTML is already selected, but the editor shown in the image above hasn’t loaded. If this happens, you need to select a different mode and then switch back to Full HTML. The button for inserting images is circled in green in the image, and the button for inserting snippets from Microsoft Word is circled in blue. Creating a New Page To create a new BatrakhWiki page, you need to create a special link on an existing page.

In edit mode, this link looks like this: On a saved page, this structure (two opening square brackets; the name of the new page; a vertical bar; the name of the new page; two closing square brackets) is highlighted as a link: [[ Link to new page|Link to new page ]]. If you click on such a link (in a saved or web-based window, not in edit mode!), a window like this will open Now you can switch to Full HTML mode (using the toggle located below the part of the window shown in the image above) and start typing text and inserting images. In the lower-left corner of the toolbar is the style selection button. It is recommended to assign the "Normal" style to the main text and one of the heading styles to the headings.
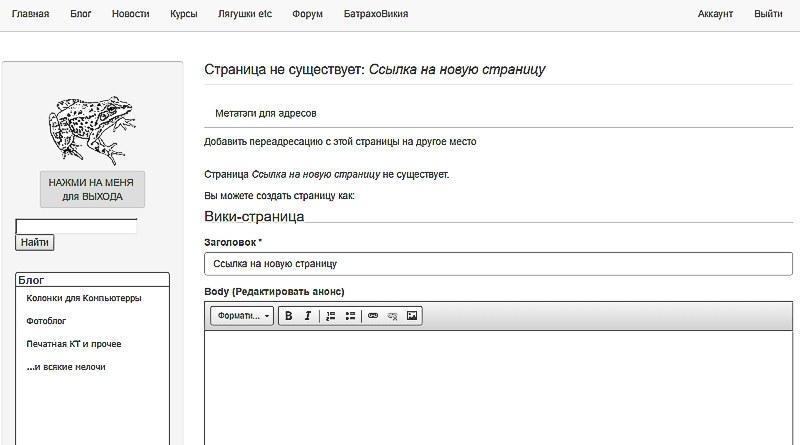
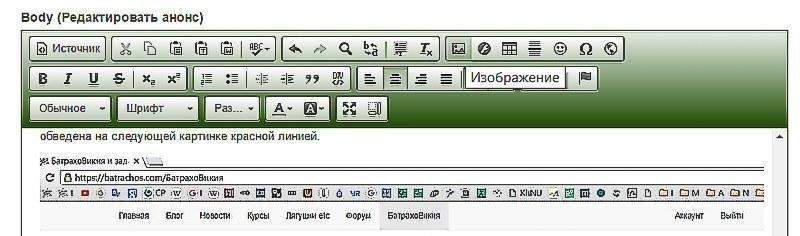
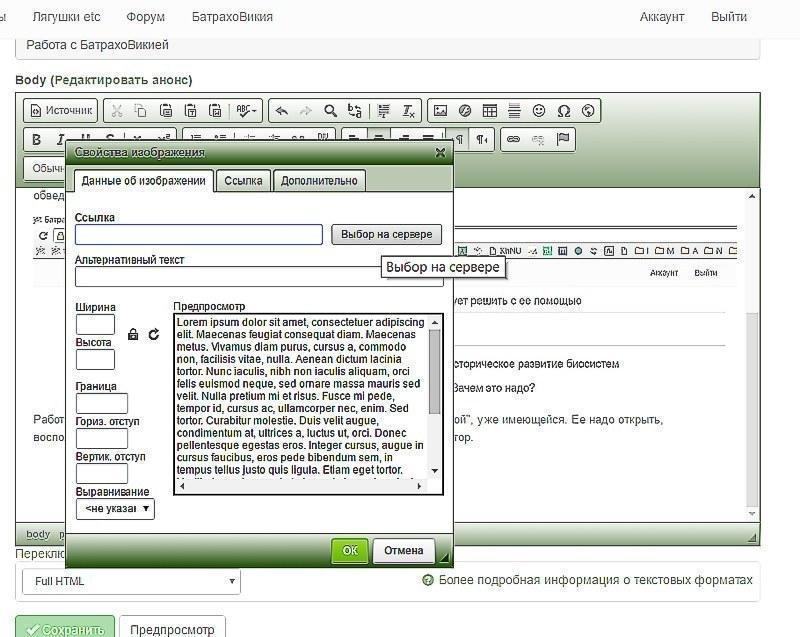
Figure out which button on the toolbar performs which function... Inserting Illustrations To insert an illustration into your page, you must first create it in some way (or, for example, find it online, download it, and save it to your computer’s hard drive). To insert it into the page, do the following. Click the "Image" button (the one circled in green in one of the illustrations above). In the image below, this button is clicked, and a tooltip is visible below it. An image selection window will appear. Select the "Select from Server" option (in the image below, a tooltip appears next to it). You will need to specify the directory from which you are taking the image (or into which you are uploading your image).
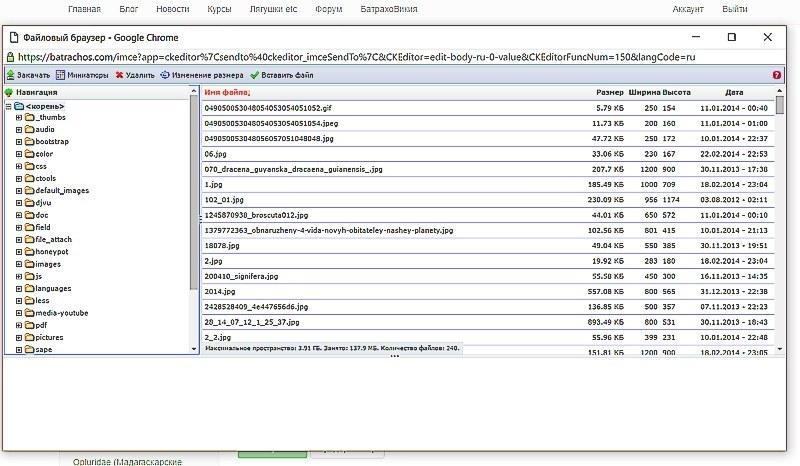
I ask that you work only with one folder on the site—the BatrachoWikia folder, which is located in the pictures directory. In the image below, you can see the pictures directory selected.
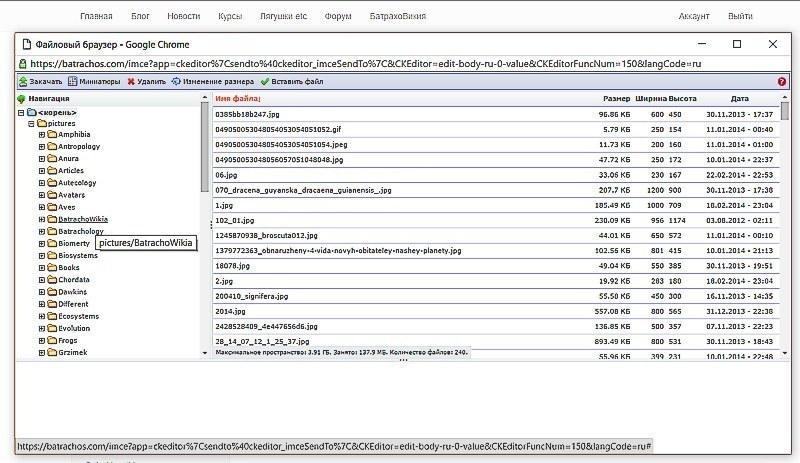
It may not be visible in the left pane, so you’ll need to scroll down to find it (in the image, it’s the second one from the bottom). Go to the pictures folder and select the BatrachoWikia directory. In the next image, the BatrachoWikia folder is already open.
In the illustration, there is only one file in it, but when you open it, there will be more files inside.
You can select one of the files already in this folder or upload a new one of your own.
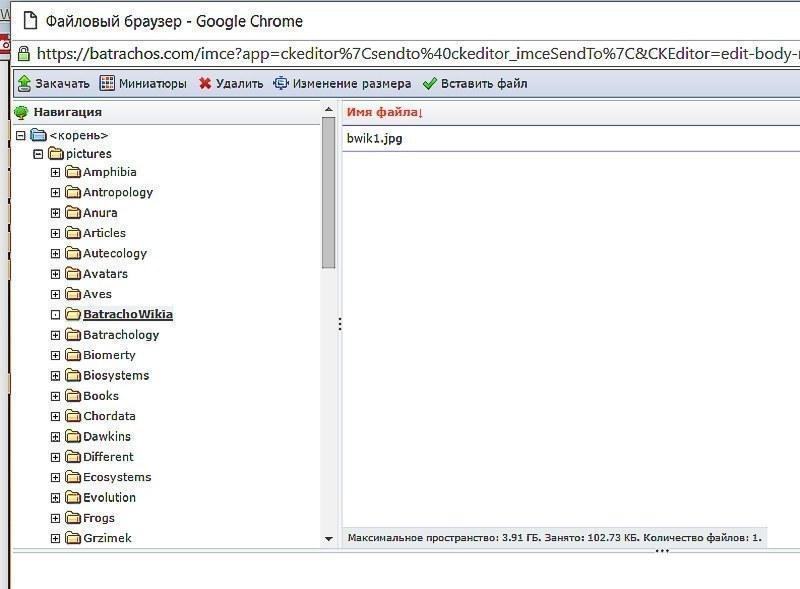
This is done using the "Upload" button.
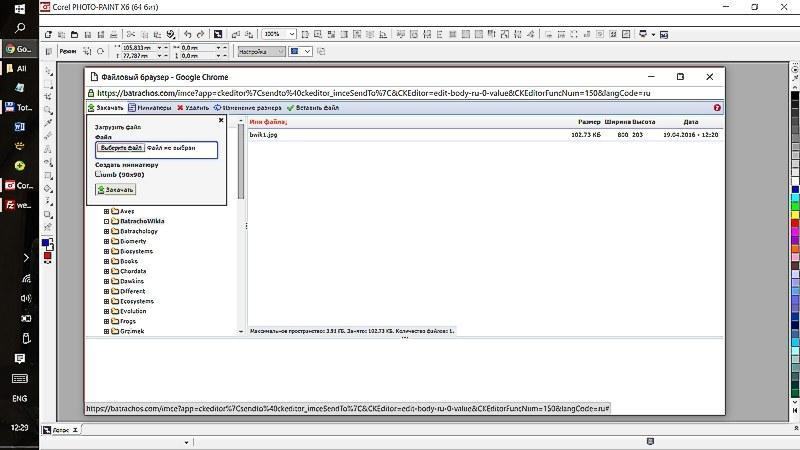
In the dialog box opened by this button, click the "Select File" button, specify the path to the desired file on your disk, and click the "Open" button at the bottom right of the dialog box. The screen will look something like this. You can see that the file bwik8.jpg is selected in the upload window.
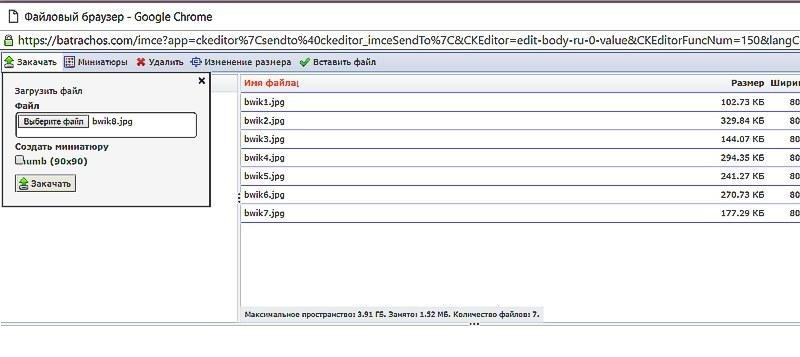
After clicking the "Upload" button located at the bottom left of the window, the file will be uploaded to the site. It will appear in the file list on the right, and a preview window will open below.
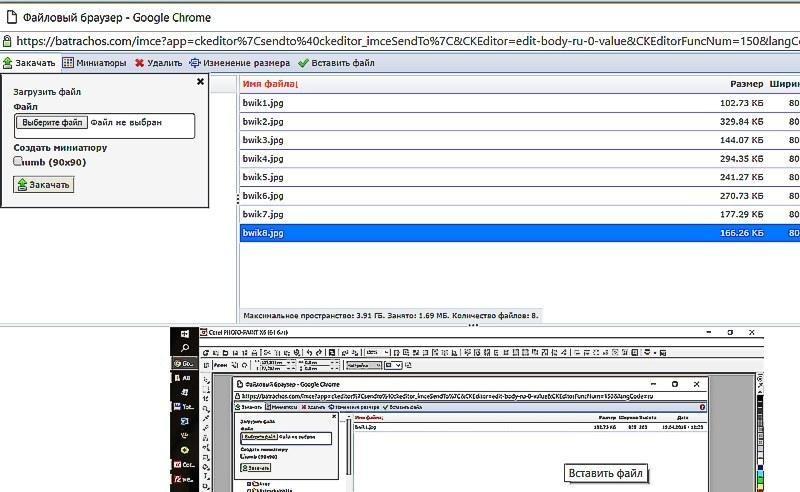
By clicking on the file preview window or selecting it from the list, you will insert it into your page.